How to Fix Headphones
Whether you’ve got a pair of ear headphones or circumaural headphones, wireless headphones, or wired headphones, it can be incredibly frustrating when they stop functioning normally. Headphone problems are common across all types, from semi-open headphones to bone conduction headphones, USB headphones to regular headphones.
It’s important to remember that most headphones, from small headphones to Bluetooth headphones, can be repaired, saving you the cost of buying new ones. This article will guide you through the process of fixing various headphone issues, whether you’re dealing with malfunctioning headphones, water-damaged headphones, or even broken headphones.
The fix steps we will discuss are applicable to many modern headphones, and we will provide a low headphones buying guide for those that are beyond repair.

Common Headphone Problems
Common headphone problems such as broken wires, poor sound quality, and unreliable connection can significantly affect your audio experience. With ear headphones, circumaural headphones, and even small headphones, these issues may arise. Particularly, wireless headphones like Bluetooth headphones may face connection problems.
For wired headphones, semi-open headphones, bone conduction headphones, USB headphones, and Bose headphones, broken wires, and poor sound quality are frequent issues. Additionally, water-damaged headphones and malfunctioning headphones are not uncommon. Fortunately, fixing wiring issues and troubleshooting noise cancellation is achievable with the right know-how.
Broken Wires
Broken wires represent one of the most common and frustrating issues that impact many modern headphones. This problem can affect a range of headphone types including circumaural headphones, open-back headphones, and even wireless headphones.
The issue often manifests as intermittent audio or complete loss of sound. This is typically caused by the fraying or breakage of wires within the headphone cable. While wireless headphones and Bluetooth headphones like Bose headphones may seem immune to this issue, they’re not entirely exempt as they still have wires connecting the headphone drivers within the earpieces.
Even though broken wires are a common headache, there are safe DIY repairs available.
Poor Sound Quality
Bridging from our previous discussion, let’s delve into poor sound quality, a prevalent issue among most headphones. Despite having a wide array of headphones available in the market, including ear headphones, Bluetooth headphones, bone conduction headphones, and USB headphones, this problem seems to persist.
To elaborate, the sound produced by Bose headphones or even different headphones like open-back headphones may sometimes be less crisp and clear than open-back headphones.
This can be attributed to various factors such as damaged headphone drivers, faulty headphone jacks, or even issues with your Android phone or other devices used for audio playback.
Misalignment of headphone pads or headphone plugs could also be a culprit. Substandard headphone amps may affect the audio output too.
Unreliable Connection
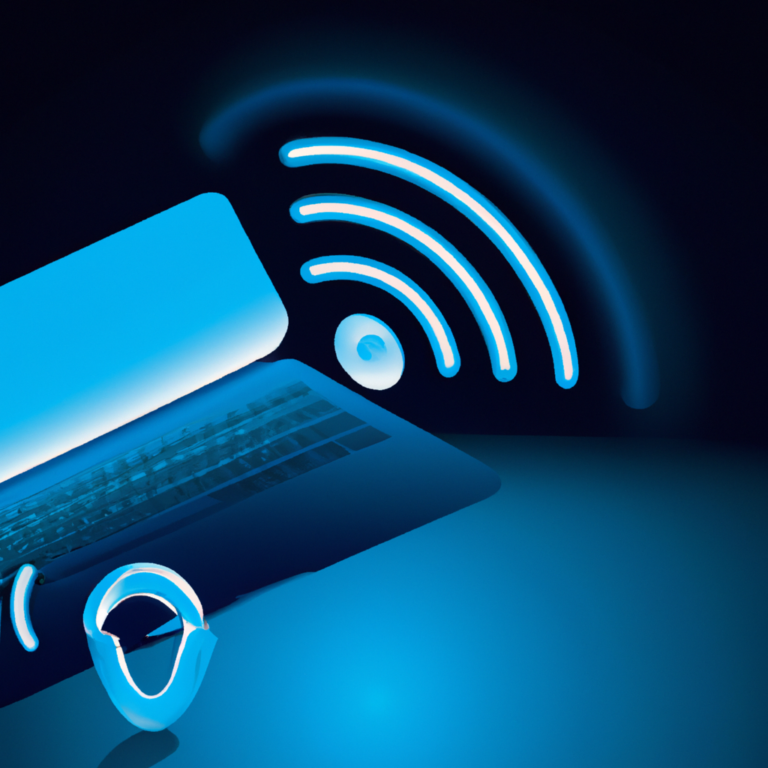
Moving on from physical issues, let’s now tread on the digital terrain of unreliable connections. With the evolution of technology, many headphones, especially ear headphones, Bluetooth headphones, and USB headphones, rely on wireless connections to pair with devices.
However, these connections are not always reliable, which can cause your audio experience to suffer. For instance, Bose headphones and other different headphones may face problems with their Bluetooth or USB connectivity, interrupting your music or phone calls.
This is a common issue that many headphone users face, regardless of whether they use budget headphones or opt for higher-end models like LG headphones.
Cleaning and Maintenance
After using your ear headphones, cleaning the exterior is crucial. Use a soft cloth to wipe down your Bluetooth headphones. Next, we delve into cleaning the earbuds, a delicate process that involves removing the headphone pads for thorough cleaning.
Always inspect your headphones for worn parts that may need replacement, including headphone pad replacement or fixing a broken headphone band. Prevention of moisture damage is vital, especially for USB headphones, to maintain audio quality.
Regularly check for wear and tear, including frayed headphone cables or issues with headphone jacks.
Cleaning the Exterior of the Headphones
Having discussed common headphone problems, it’s critical to note that maintaining your headphones can help prevent many of these issues. Let’s now turn our attention to cleaning the exterior of the headphones. This is a simple yet crucial part of headphone maintenance, irrespective of the type you own, be it in-ear headphones, Bluetooth headphones, or USB headphones.
Firstly, ensure your headphones are disconnected from any device and powered off. Using a dry, soft cloth, gently wipe the headphone jacks, headphone control, and headphone drivers to remove dust and grime. Pay close attention to the headphone plugs and headphone pads, as these areas often harbor dirt. For stubborn dirt, slightly dampen the cloth and gently clean the area.
Cleaning the Earbuds
While the myriad of issues with headphones can be daunting, understanding the importance of cleanliness and maintenance can save you from a lot of tech problems. Let’s dive into the process of cleaning the earbuds of your headphones.
Whether you have in-ear headphones, Bluetooth headphones, or USB headphones, be it Bose headphones or any other brand, cleaning your earbuds is vital for maintaining optimal audio quality. Ensure to unplug your headphones from any device before starting.
Use an alcohol-based cleaning solution and a soft cloth or cotton swab to gently clean the earbud surface. Be careful not to get any liquid inside the headphone drivers or the headphone jack. This simple yet effective step can extend the life of your headphones and save you from unnecessary headphone repair/replacement options.
Replacing Worn Parts
Over time, over-ear headphones, be they USB headphones or Bluetooth headphones, may start showing signs of wear and tear. The headphone pads or headphone jack might need replacement, or the headphone wire may become frayed.
It’s crucial to ascertain the extent of damage before proceeding with any headphone repair/replacement options. Be it a broken headphone band or a frayed headphone cable, some issues can be fixed with safe DIY repairs, while others may need professional intervention.
Remember, the step towards fixing headphone issues is identifying them.
Troubleshooting Guide
Our Troubleshooting Guide provides insightful step-by-step instructions to resolve various tech problems with your audio devices. We’ll first delve into checking the audio source and testing your ear headphones, including Bose headphones and Bluetooth headphones.
Then, we’ll examine essential aspects such as verifying the headphone jack and tackling issues like a sound imbalance or distorted sound in your USB headphones. This guide also covers how to handle complications with your headphone control and headphone drivers, and offers safe DIY repairs for a broken headphone band or headphone pad replacement.
Checking the Audio Source
Moving on from the meticulous task of cleaning and maintenance, we now step into the realm of troubleshooting. This section is designed to assist you in identifying and resolving common issues you may face with your headphones. Let’s kick off with one of the most fundamental steps: Checking the audio source.
Sometimes, the problem lies not with your Bose headphones or Marshall headphones, but with the audio source. Be it your Android phone, iTunes on your laptop, or your iPhone, confirm that the volume isn’t muted and is set at an audible level.
For Bluetooth headphones, ensure they are properly paired with your device. For USB headphones, check if they are correctly plugged into the headphone jack.
Testing the Headphones
This is a necessary step to identify any potential issues and ensure the optimal performance of your device.
Firstly, ensure that your headphones are properly connected to your audio device, whether it’s an Android phone, a computer, or any other device. Inspect the headphone plugs thoroughly for any damage.
If you are using Bluetooth headphones, make sure they are in pairing mode. Note that specific pairing methods may vary across brands like Bose, LG, or Marshall headphones.
Run a sound test across all channels. For in-ear headphones or earphones, check each earpiece individually. For USB headphones, check if the headphone drivers are up-to-date.
Checking the Audio Jack
Now that your headphones are spotless and well-maintained, let’s move forward to troubleshoot any persisting issues. In this section, we will tackle checking the audio jack. The audio jack holds great importance, as it’s the primary connection between your headphones and the audio source.
If you’re not hearing sound or it’s distorted, first, check the headphone jack’s connection to your devices like phones, computers, etc. An improperly inserted headphone jack can cause issues.
Also, inspect the headphone jack for any visible damage. Broken headphone wires or a bent jack may require safe DIY repairs or professional phone repairs.
Replacing Wires and Cords
To effectively replace wires and cords for devices like ear headphones, Bluetooth headphones, or USB headphones, understanding the subtopics is crucial. First, we will tackle checking the wiring to identify any faults in your headphones.
Next, soldering the wires is an essential skill, especially when dealing with headphone drivers and earphone wires. Then, we’ll discuss replacing the audio jack for better audio quality and extended Android phone battery life. Proper wire connections will then be covered, ensuring safe and effective DIY repairs.
Checking the Wiring
Having navigated through the troubleshooting maze, we now proceed to the hands-on realm of replacing wires and cords. Our first point of focus in this journey will be checking the wiring.
Just like a doctor would look for symptoms before making a diagnosis, understanding the condition of your headphone wires is crucial. For headphones, this involves a careful examination for any physical damages – are there any visible cuts or frays? Is there any loss of sound when you twist or bend the wire?
This process is particularly important in Bluetooth headphones and USB headphones, rely on these connections for their function.
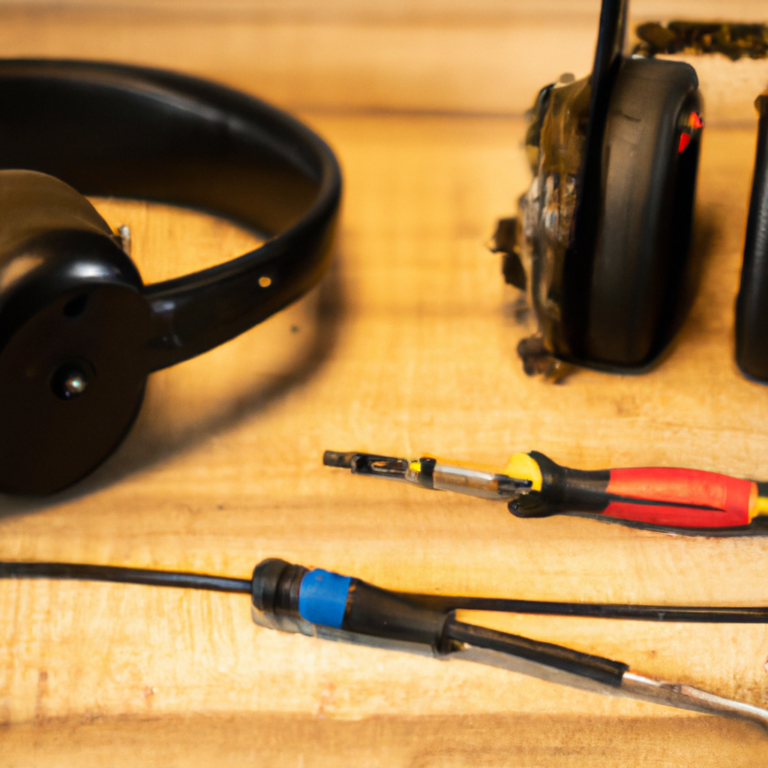
Soldering the Wires
In the wake of our troubleshooting guide, let’s delve into the intricate world of soldering the wires. This crucial step could breathe new life into your broken headphones and restore their sound quality. The skill of soldering can prove invaluable.
Start by removing the headphone jack and exposing the earphone wires. Carefully solder the wires using the right tools, ensuring you adhere to safe DIY repair guidelines. Remember, the wrong connection could potentially harm your Android phone battery life or other devices.
Soldering isn’t restricted to earphones alone. It can be a part of phone repairs, fixing USB headphones, and more.
Replacing the Audio Jack
After successfully diagnosing the issue, it’s time to dive into the practical part of our guide. Let’s see how we can replace the audio jack, a common issue with headphones of all types.
Your headphone jack might be the culprit if your headphones are functioning less effectively than open-back headphones. To replace the headphone jack, first, disconnect your phone, computers, or other devices.
Carefully remove the old jack from your broken headphones, making sure to note its wiring configuration for later. Next, strip the headphone wires and prepare your new headphone jack for installation.
Repairing Damaged Earbuds
To start the process of repairing damaged earbuds, you’ll first need to apply adhesive to the broken headphones. Our guide will walk you through this step and provide advice for the safe DIY repairs of various types of headphones.
The next subtopic is replacing the foam padding. We’ll provide you with a step-by-step guide on how to replace headphone pads. After that, we discuss reattaching the earbuds, a crucial step in the repair of in-ear devices.
Applying Adhesive
Like a surgeon in an operating room, precision and attention to detail are key when it comes to this process. Start by cleaning the surface of your broken headphones. Then, apply a thin layer of adhesive, making sure to spread it evenly.
The repair process can seem daunting, but remember, effective repairs can breathe new life into your best repairable headphones. Just follow these step guides and exercise safe DIY repairs to fix your beloved audio tech.
Replacing the Foam Padding
Firstly, purchase replacement headphone pads suitable for your specific headphone model, be it Bose headphones, LG headphones, Marshall headphones, or other brand headphones. Ensure to choose the best repairable headphones.
Carefully remove the old, broken padding from your ear headphones. Next, apply gentle pressure to fix the new headphone pads onto the headphones. This simple step can entirely transform your audio experience.
Taking care of the headphone pads can significantly enhance your device’s lifespan.
Reattaching the Earbuds
While replacing wires and cords is crucial, another step in the process of headphones repair is to reattach the earbuds. Whether you’re dealing with Bose headphones, USB headphones, or Bluetooth headphones, this step is essential for the completion of your safe DIY repairs.
To begin with, you’ll need to apply a suitable adhesive to the broken parts of your ear headphones. This is a delicate process, as applying too much adhesive can damage other components of your headphones. After applying the adhesive, carefully realign the earbuds and press them together.
Once the adhesive has dried, your earphones should be securely reattached. Remember, the goal is to restore your headphones to their previous state, not to make them appear new.
Preventing Future Damage
To prevent future damage to your headphones, several precautionary measures are necessary. Keeping your headphones, in protective cases can prevent physical damage. Avoiding excessive stress on cables extends the life of your headphone.
Unplugging headphones properly can save the headphone jack and prevent broken cables. Efficient cable management can ensure longevity, especially for earphones.
Avoiding Excessive Stress on Cables
The headphone cable is often the most vulnerable part. This is because it experiences stress and strain during use, which can eventually lead to broken wires. To avoid this, always ensure to handle your headphones with care during use and storage.
Avoid pulling the cable or headphone jack forcefully when unplugging your headphones. Instead, grasp the plug firmly and pull out straight, avoiding any sideways force. This simple step can significantly extend the lifespan of your headphones.
Unplugging Headphones Properly
To prevent any damage, it’s crucial to grasp the plug, not the cable, when removing your headphones. Yanking them out by the cord can put excessive stress on the cable, leading to potential breakage. Be mindful of this, especially during phone calls or when in a rush.
Professional Repair Services
When encountering issues with headphones, the first step usually involves contacting the manufacturer. If the issue persists, seeking help from a professional technician becomes necessary. They can aid in the best headphones repairs, headphone amps fixing, and more.
Certain modern Bluetooth headphones come with a warranty to consider, often covering a specific timeframe for professional repairs.
Considering a Warranty
In the intricate world of headphone repairs, not all damage can be prevented, and sometimes, even the most careful of users are met with unexpected malfunctions. This brings us to the invaluable role of warranties. Warranties can serve as a safety blanket for broken headphones and earphones.
They can offer support services to fix damages that fall beyond safe DIY repairs, covering costs for professional repairs.
Conclusion
In conclusion, fixing headphones is a fairly straightforward process, involving safe DIY repairs to common problems such as broken wires and cords, or damaged earbuds. With the help of a troubleshooting guide, you can easily identify the issue with your headphones.
Sometimes, the issue might be as simple as entering pairing mode correctly, especially with certain modern Bluetooth headphones. However, if all DIY fixes fail, consider seeking professional service. It might also be an opportunity to explore new ways to use your unused devices, or even an excuse to buy new headphones.
Our Mission: At AudioInspects, we are dedicated to providing the most comprehensive and authentic reviews of audio equipment on the market. We conduct independent testing and research of products, so you can make an informed decision before making a purchase. Our mission is to help you find the best audio equipment to improve your listening experience. So trust us to deliver the most reliable recommendations and advice.
Disclosure: When you do decide to make a purchase through our links, please note that we may earn a commission, but this does not affect the honesty of our reviews. You can read our affiliate disclosure in our Disclosure.