The Ultimate Guide to Replacing Your Turntable Needle
For anyone serious about their vinyl collection, you’ll know that the needle, or stylus, of your turntable plays a crucial role in ensuring the quality of your sound. Over time, this key component can wear out, and when that happens, it can drastically affect your listening experience.
It’s important to understand how to replace the needle on a turntable because it’s not just about preserving the rich sound of your records, but also about maintaining the longevity of your precious collection.
In this article, we’ll provide you with The Ultimate Guide to Replacing Your Turntable Needle. We understand that the process might seem daunting at first, especially if you’re a newbie to the world of vinyl. But don’t worry, we’re here to simplify things and guide you through each step. By the end of this guide, you’ll be able to replace a worn-out needle like a pro!
The Lifespan of a Turntable Needle
Just like any other device, turntable needles also experience wear and tear. However, the rate at which they deteriorate is influenced by several factors.
A typical turntable needle can last between 500 to 1,000 hours of usage. But it’s not as black and white as it seems. You see, the type of needle can impact its endurance. For instance, a moving magnet stylus, a popular choice among vinyl lovers, can last up to 1,000 hours. On the other hand, a moving coil stylus, renowned for its superior sound quality, might need replacement after 500 hours.
Other factors that can reduce a needle’s longevity include frequent playing of warped records or playing with a misaligned cartridge. It’s all about the care you put into maintaining your beloved turntable and its needle. In the end, it’s a delicate balance that every vinyl enthusiast learns to master.
Signs Your Needle Needs Replacement
First, keep your ears peeled for a muddy sound. This is when the audio from your turntable seems cloudy, lacking clarity and precision. It’s as if someone tossed a handful of dirt into your music!
Next, listen for distortion in the sound. This takes the form of crackling, popping, or static noise that wasn’t present before. You’ll notice that your favorite tunes just don’t sound right anymore.
Another sign to look out for is termed sibilance. This is when ‘S’ and ‘T’ sounds come out overly pronounced or harsh on your tracks. It’s as if those letters are all you can hear!
Lastly, pay attention to the high frequencies in your music. If you find them sounding shrill or causing discomfort to your ears, then it’s time to replace your needle.
Types of Turntable Needles
There are two key types to consider: those with shifting magnets and those with shifting coils.
Shifting magnet needles, as the name suggests, work by moving a magnet near a coil. This movement creates an electrical signal, which is then sent to your audio system. When it comes to replacing these needles, it’s generally a straightforward process. Simply remove the old needle, being careful not to damage the arm, and slide in the new one.
On the other hand, shifting coil needles operate by moving a coil within a magnetic field. The replacement process for these needles is slightly more complex. In most cases, you’ll need to replace the entire mechanism, not just the needle itself. Take care not to cause any damage during the procedure.
Remember, whichever type of needle you have, always handle it with care and precision.
Step-by-Step Guide to Replacing the Needle
Follow these professional instructions to replace the needle on your turntable and ensure optimal sound quality.
Step 1: Safety Measures
Before you begin, ensure your turntable is unplugged and turned off to prevent any accidental damages or injuries.
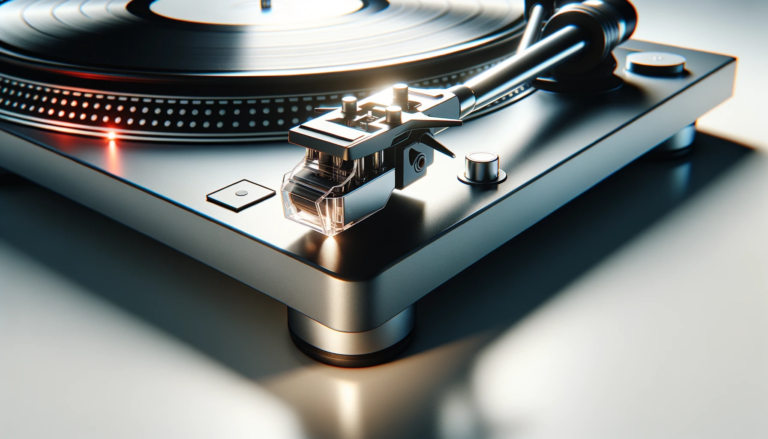
Step 2: Identify the Stylus
The stylus or needle is located at the end of the turntable’s tonearm. It is usually covered by a small plastic guard which can be easily removed by sliding it off gently.
Step 3: Remove the Old Stylus
To remove the stylus, hold the cartridge (the housing at the end of the tonearm where the stylus is attached) gently. Depending on the model of your turntable, the stylus may slide out, or it may require a gentle upward motion. Be careful not to apply too much force as it can damage the cartridge.
Step 4: Purchase a New Stylus
Make sure you purchase the correct replacement stylus for your turntable model. If you are unsure, take the old stylus with you to the store or consult with a professional.
Step 5: Install the New Stylus
To install the new stylus, hold the cartridge gently and slide the new stylus into a place where the old one was removed. Some models may click into place, while others may just slide in. Again, do not force it.
Step 6: Test the New Stylus
Once the new stylus is in place, plug your turntable back in and play a record to test the sound. If everything sounds good, then the job is complete.
Step 7: Protect the New Stylus
Remember to cover the stylus with the guard when it’s not in use. This will protect it from dust and accidental damage, extending its lifespan.
Remember to handle all components with care during this process, as turntable parts are delicate and can be expensive to replace. If you encounter any difficulties, don’t hesitate to consult with a professional.
Maintaining Your New Needle
Now that you’ve successfully replaced your needle, let’s not forget to keep it in top shape. As any vinyl enthusiast knows, maintenance is key to preserving that crisp sound we all love.
In the pursuit of sound consistency, remember that cleaning is your best friend. A bit of light cleaning after each use goes a long way in keeping your needle in optimal condition. Use a gentle brush, moving from the back towards the tip of the needle, to remove any dust or buildup.
Additionally, proper storage is just as important. When not in use, protect your needle from dust and potential damage by returning it to its protective cover, or investing in a quality, dust-proof needle case.
Remember, it’s not just about having a new needle, it’s about maintaining it well. So, follow these simple tips and keep spinning those records with the sound quality you love.
FAQs
How often should I replace my turntable needle?
The frequency of replacing your turntable needle largely depends on its usage and the level of care taken during its use. On average, a turntable needle, also known as a stylus, should be replaced after approximately 1000 hours of use.
Can a worn-out needle damage my vinyl records?
Unfortunately, the answer is yes. If your needle is excessively worn, it can cause irreversible damage to your records. These delicate items can be scratched or scuffed by a needle that’s past its prime. This not only affects the auditory experience but also the longevity of your records.
What’s the difference between a needle and a stylus?
Although these terms are often used interchangeably, they do not signify the same component. The needle, also known as the tip, is a part of the stylus that directly touches the record groove. Its purpose is to pick up sound vibrations from the record grooves. On the other hand, the stylus refers to the entire component, including the needle, its supporting structure, and the cantilever (the arm that holds the needle).
How much does a good-quality needle cost?
The price of a top-tier needle can range significantly, typically from $20 to well over $300. It’s important not to skimp on this critical component, though. While it’s tempting to opt for cheaper alternatives, keep in mind that high-end needles often provide more reliable and superior audio performance.
Conclusion
So, there you have it! We’ve covered all you need to know on the topic of updating your turntable needle, from recognizing when a replacement is due, to the actual act of swapping out the old for the new. Remember, your needle’s longevity greatly depends on how well you take care of it.
Don’t fret if you’re still a bit unsure – this is a learned skill that improves with practice. Just be patient with yourself and you’ll master it in no time. Here’s to better, clearer, and more enjoyable music sessions ahead!
Our Mission: At AudioInspects, we are dedicated to providing the most comprehensive and authentic reviews of audio equipment on the market. We conduct independent testing and research of products, so you can make an informed decision before making a purchase. Our mission is to help you find the best audio equipment to improve your listening experience. So trust us to deliver the most reliable recommendations and advice.
Disclosure: When you do decide to make a purchase through our links, please note that we may earn a commission, but this does not affect the honesty of our reviews. You can read our affiliate disclosure in our Disclosure.