How to Connect Bose Headphones to Mac in 5 Easy Steps
If you’re looking for a way to connect your Bose headphones to your Mac, then you’ve come to the right place. In this article, we’ll be discussing the easy steps required to get the job done. With these simple instructions, you’ll be able to start enjoying your favorite music on your Bose headphones in no time!
How to Connect Bose Headphones to Mac via Bluetooth
Connecting your Bose headphones to a Mac via Bluetooth is a straightforward process that enhances your audio experience, whether you’re listening to music, attending virtual meetings, or watching videos. This guide will walk you through the simple steps to pair your Bose headphones with your Mac, ensuring a seamless and wireless connection for your audio needs.
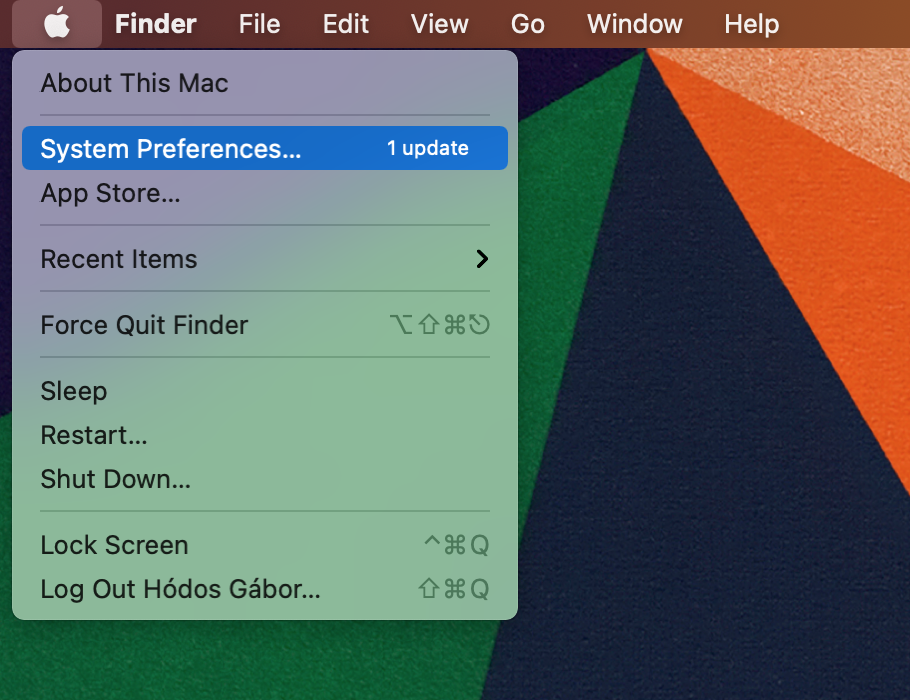
1. Open System Preferences
Access System Preferences by first opening the Apple menu and navigating to the “System Preferences” option.
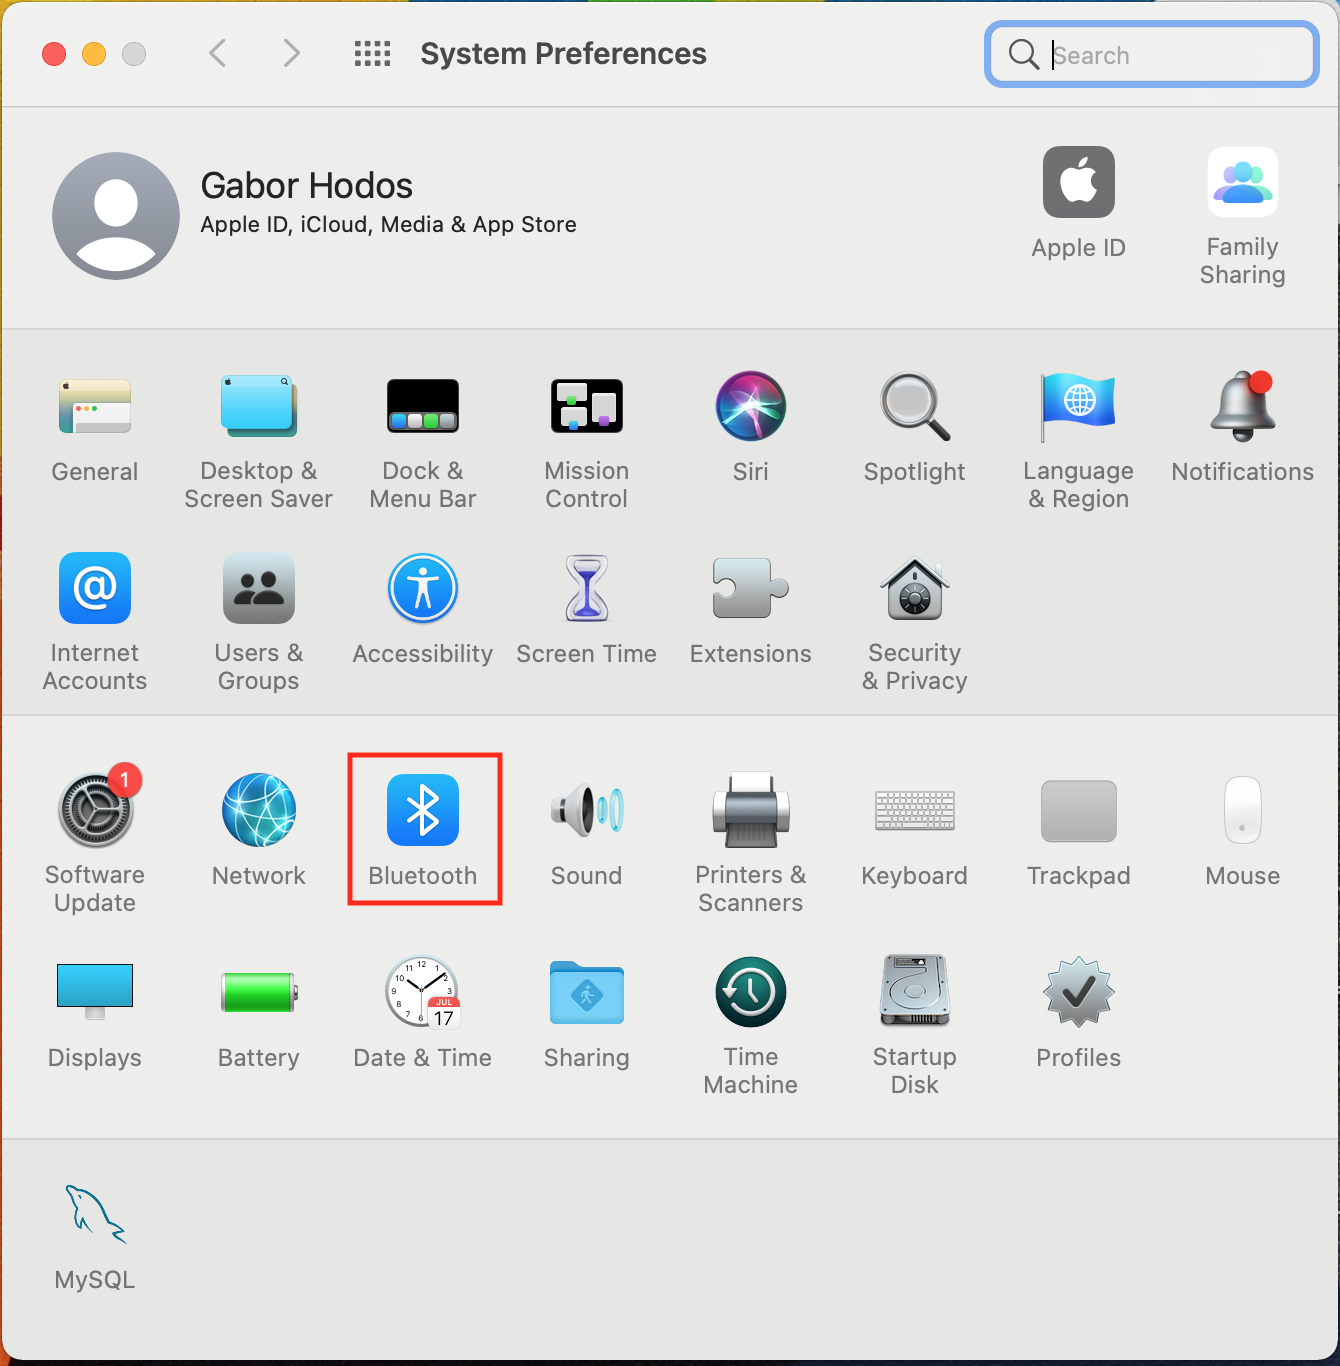
2. Click on Bluetooth
In the System Preferences window, click on the Bluetooth icon. This will open up a list of all your available Bluetooth devices.
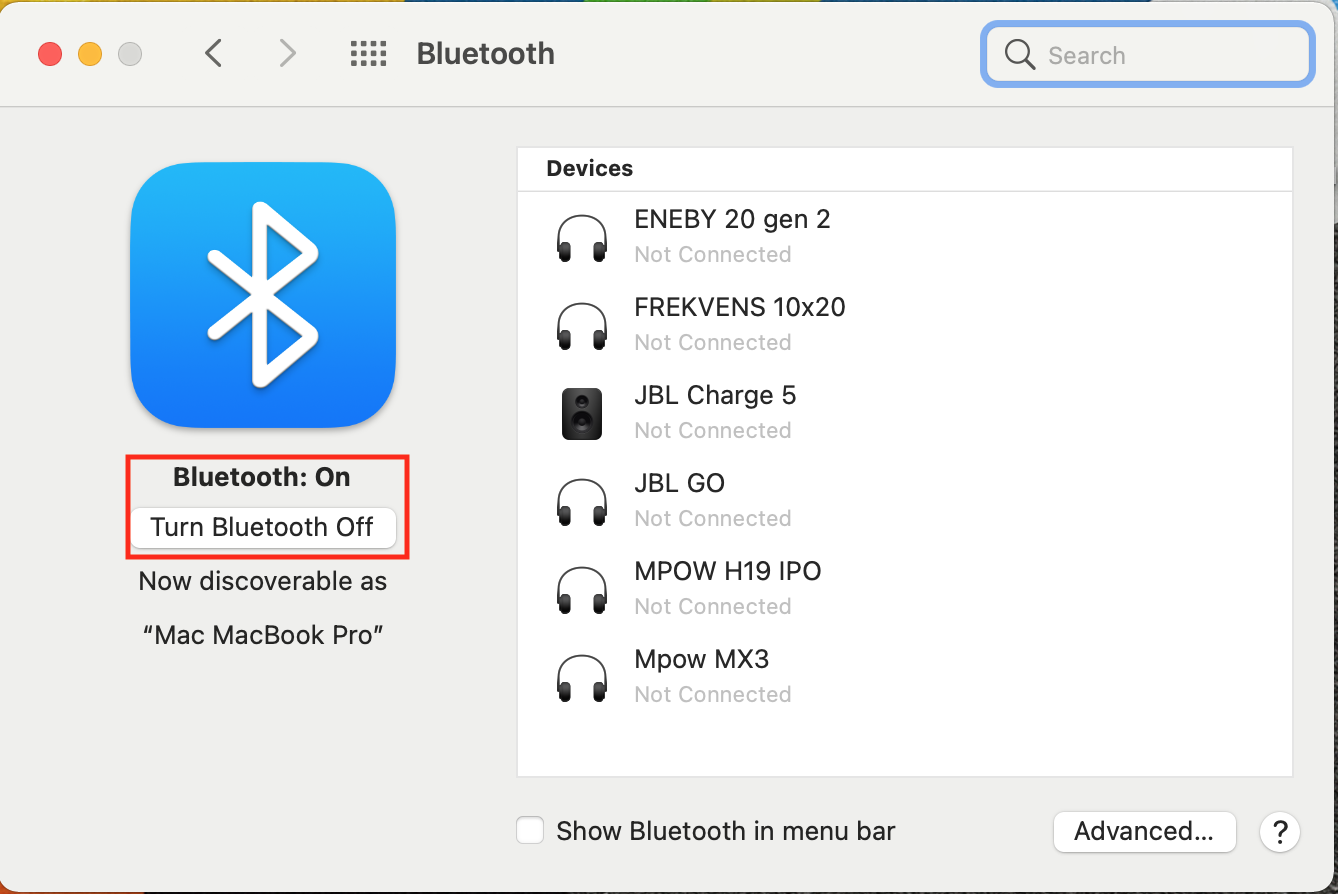
3. Make sure Bluetooth is on
If you see the Turn Bluetooth On button, then you need to enable it. Click on the “Turn Bluetooth On”.
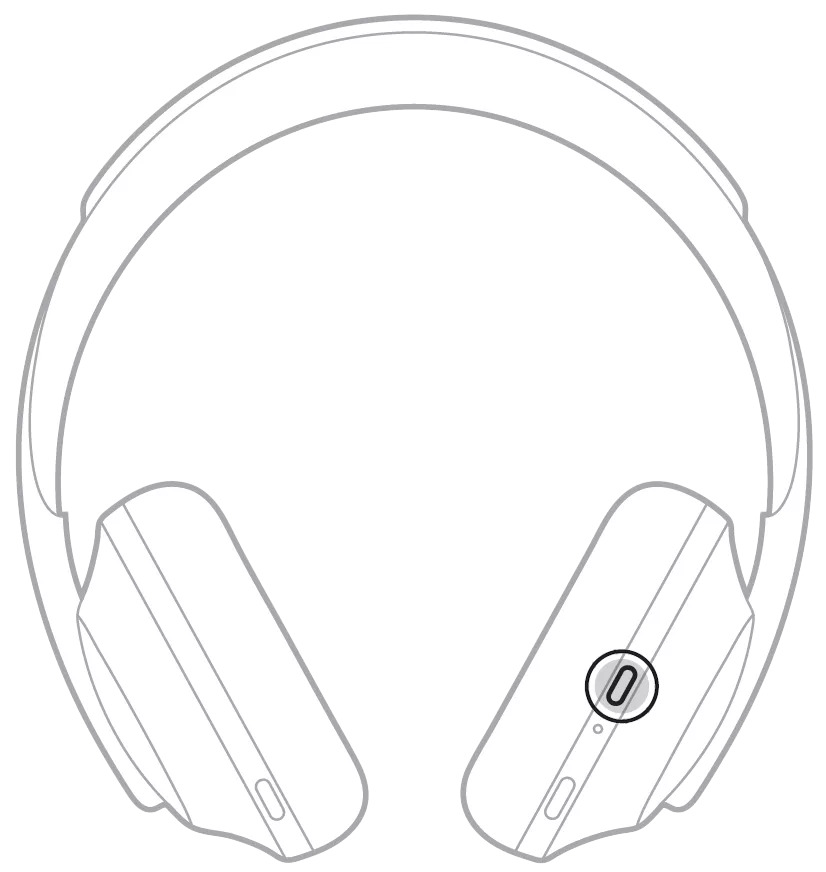
4. Put your Bose headphones in pairing mode
Make sure that your Bose headphones are in pairing mode. This means that they should be searching for available Bluetooth devices to pair with. To do that press and hold the Power/Bluetooth® button for a few seconds until the light below the button begins to slowly blink.
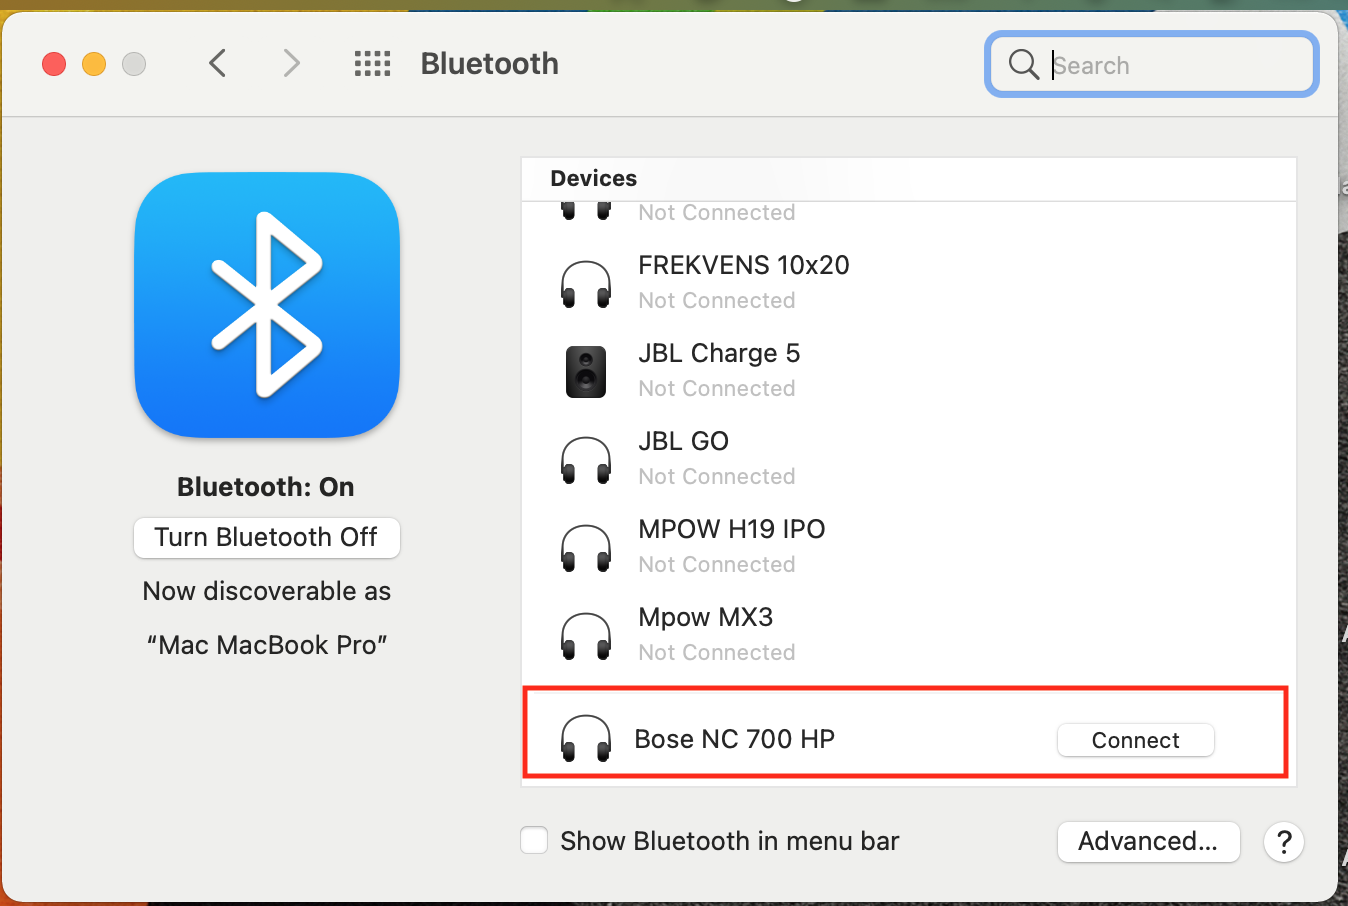
5. Connect your Bose headphones to your Mac
Once your Bose headphones are in pairing mode, you should see them appear in the list of available Bluetooth devices. Select them and click “Connect” to establish the connection.
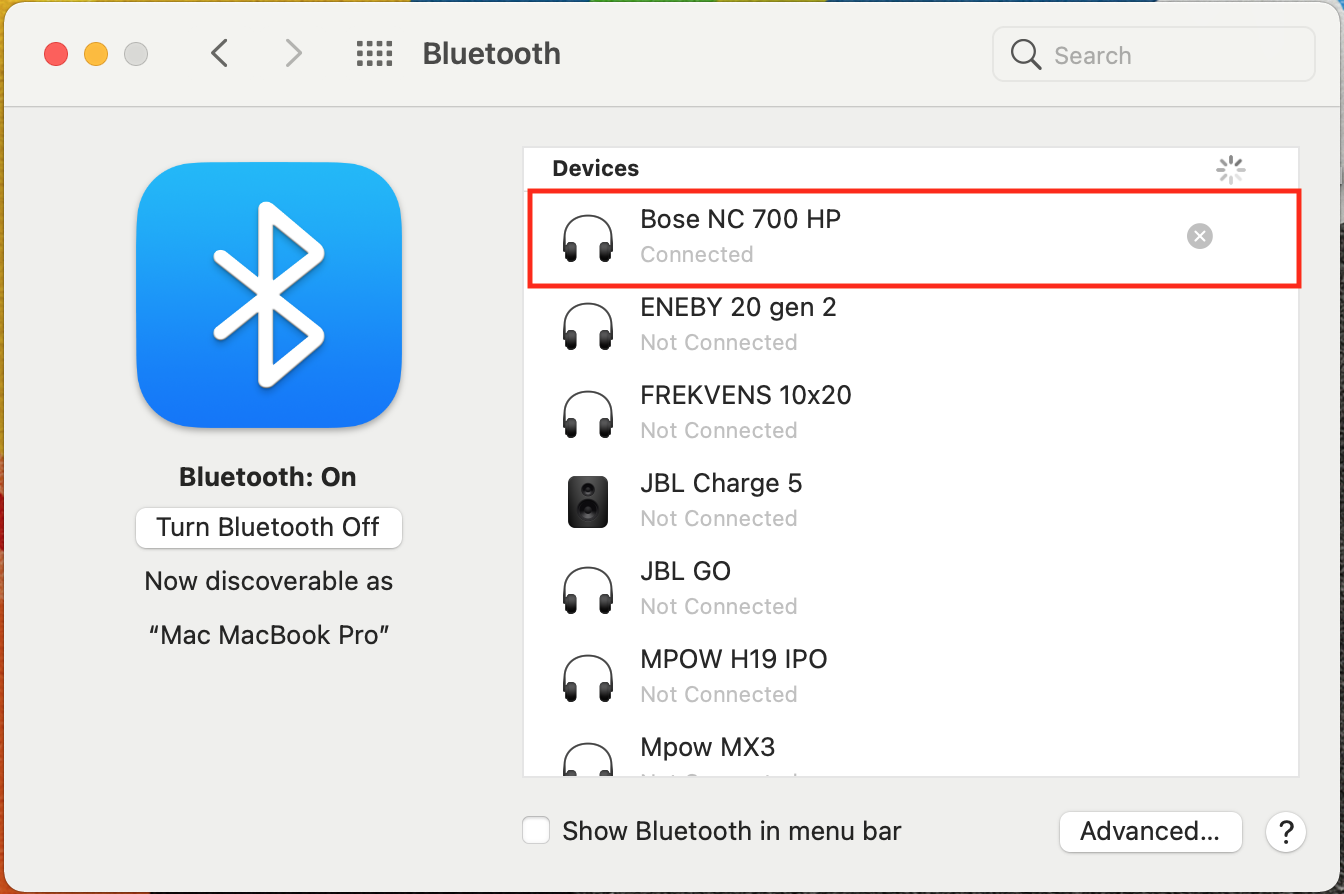
Your Bose headphones should now be connected to your Mac and ready for use.
Once connected, you should hear a faint sound from the speakers indicating that they are working correctly.
Set Up Audio Settings
After connecting your Bose headphones, open up System Preferences and select “Sound” from the list of options. From here, select “Output” and choose “Bose” as your preferred output device. This will ensure that all audio produced by your Mac will play through your new headphones instead of through the computer’s built-in speakers.
FAQs
Conclusion
With these simple steps, anyone can quickly connect their Bose headphones to their Mac without any hassle or confusion. Whether it’s for listening to music or making video calls – having great quality audio is essential for getting the most out of any experience on a laptop or desktop computer and now it has never been easier than ever before thanks to this guide! So grab those headphones and get started today!
Our Mission: At AudioInspects, we are dedicated to providing the most comprehensive and authentic reviews of audio equipment on the market. We conduct independent testing and research of products, so you can make an informed decision before making a purchase. Our mission is to help you find the best audio equipment to improve your listening experience. So trust us to deliver the most reliable recommendations and advice.
Disclosure: When you do decide to make a purchase through our links, please note that we may earn a commission, but this does not affect the honesty of our reviews. You can read our affiliate disclosure in our Disclosure.