Master the Art: How to Connect Turntables to Mixer
Welcome to the world of turntable DJing! If you’re eager to learn how to connect turntables to mixer and unleash your creativity as a DJ, you’ve come to the right place.
In this guide, I will walk you through the step-by-step process of setting up your turntables with a mixer, understanding the components of a turntable, cueing up tracks, mastering beatmatching techniques, and adjusting tempo and pitch.
By the end of this article, you’ll have a solid foundation to start your journey as a turntable DJ.
Key Takeaways:
- Properly connect your turntables to a mixer using RCA cables for balanced sound.
- Adjust the levels on the mixer to ensure optimal sound quality.
- Plug in your headphones for cueing up tracks and practicing mixing.
- Clean your vinyl records regularly to maintain their performance.
- Practice regularly to master the art of turntable DJing and create seamless transitions.
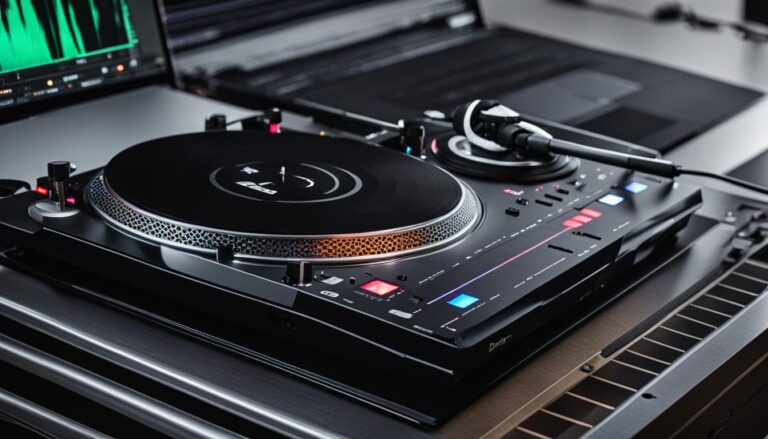
Setting Up Your Mixer and Turntables
Setting up your mixer and turntables is a crucial step in creating a seamless DJ setup. Follow these step-by-step instructions to ensure a smooth and reliable connection between your analog turntables and your mixer.
Connecting the Turntables to the Mixer
- Start by placing your turntables in a stable location, ensuring they are level and secure.
- Connect the RCA cables from the turntables to the designated “phono” inputs on your mixer.
- Make sure to connect the ground cable from each turntable to the ground terminal on the mixer to prevent any unwanted humming sounds.
- If you are using a DVS (Digital Vinyl System) compatible sound card, connect the turntables to the sound card’s input, and use USB cables to connect the sound card to your laptop or mixer.
- To ensure optimal sound quality, adjust the levels on the mixer for balanced audio output. Refer to the mixer’s user manual for specific instructions on adjusting levels.
Setting Up Cueing and Crossfader
- Plug in your headphones to the designated headphone output on the mixer to enable cueing.
- Adjust the cueing volume using the headphone volume control on the mixer.
- Assign the crossfader to the correct channels on the mixer to control the audio transition between different turntables or sources.
Once you have completed the steps above, you are ready to start exploring the world of DJing with turntables and a mixer. Take some time to familiarize yourself with the controls and features of your specific mixer and turntables, and don’t forget to practice regularly to improve your skills and develop your own unique style.
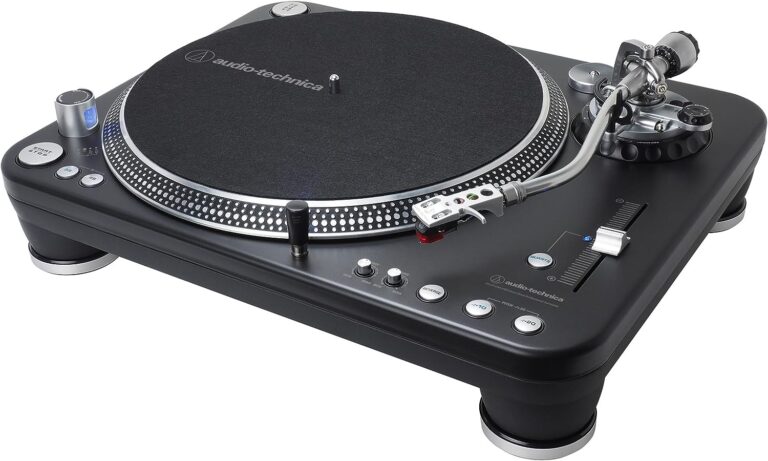
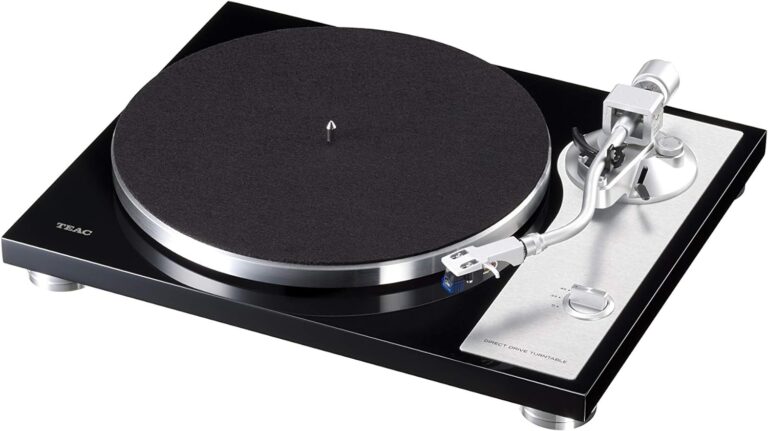
Understanding the Components of a Turntable
To truly master the art of DJing with turntables and mixers, it is essential to have a solid understanding of the components that make up a turntable. By familiarizing yourself with these components, you can better appreciate the intricacies of the equipment and make informed decisions when setting up your DJ setup.
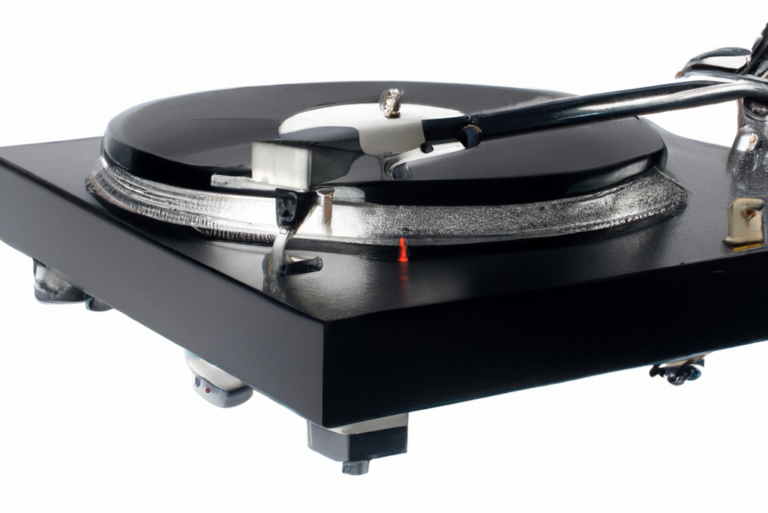
The Platter
The platter is the part of the turntable where the vinyl record is placed. It is connected to a motor that rotates it at a constant speed, allowing for the accurate playback of music. The platter can be made from various materials, such as felt or rubber, which can affect the sound quality and overall performance of the turntable.
The Tonearm
The tonearm is responsible for holding the cartridge, which houses the needle that reads the music from the vinyl record. It is crucial to ensure that the tonearm is properly calibrated to achieve optimal sound quality and prevent damage to the record. Different types of cartridges are available to cater to different DJing styles and preferences.
Other Components
In addition to the platter and tonearm, several other components contribute to the performance of a turntable. The platter mat, for example, helps to dampen vibrations and improve sound reproduction. The circuit board controls the electrical signals that are processed and converted into sound.
The feet of the turntable provide stability and help minimize unwanted vibrations. Understanding how these components work together can help you fine-tune your setup and achieve the best possible sound quality.
Cueing Up Tracks on a Turntable
When it comes to DJ setup for turntables and a mixer, one of the essential skills to master is cueing up tracks. Cueing up a track allows you to seamlessly transition from one song to another, creating a smooth and cohesive mix. To do this effectively, you’ll need to learn how to set cue points and find the desired starting point of the track.
A cue point is a specific spot in a track that you can use as a reference when mixing. To set a cue point, simply listen to the track and identify a part that you want to start from. On some turntables, you can use the plus button or the console button to mark the cue point. Once you have set the cue point, you can start playing the new track through your headphones, syncing it with the current track.
When you reach the cue point, hit play on the new track and fade out the old one. This allows for a smooth transition between the two tracks without any abrupt changes in the music. Cueing up tracks may take some practice, but with time, you’ll be able to do it seamlessly and create amazing mixes.
Tips for Cueing Up Tracks:
- Listen to the track carefully and find the desired starting point.
- Set a cue point using the plus button or the console button on the turntable.
- Sync the new track with the current track using your headphones.
- Hit play on the new track when you reach the cue point and fade out the old track.
With practice and experience, you’ll become more proficient in cueing up tracks on a turntable. This skill is crucial for creating seamless transitions in your mixes and keeping the energy flowing on the dance floor. Remember to always listen carefully to the music, trust your instincts, and have fun experimenting with different techniques.
Mastering Beatmatching Techniques
When it comes to DJ setup for turntables and mixers, one of the most important skills to master is beatmatching. Beatmatching is the process of synchronizing the beats of two tracks to create a smooth and seamless transition. By understanding the techniques involved, you can elevate your DJing skills and take your mixes to the next level.
To start beatmatching, you need to find the beat of each track. Listen carefully and identify the consistent rhythm or pulse of the music. Once you have the beats lined up, you can use the pitch shift feature on the turntable to adjust the tempo of one track to match the other. This is where having a reliable and accurate turntable with pitch control becomes essential.
It’s important to ensure that the beats are in phase with each other, meaning they start and end at the same time. This is where phrase matching comes into play. By starting the mix at the beginning of a phrase, you can create a seamless blend between the two tracks. This requires careful listening and understanding of the musical structure of the songs you are working with.
With practice, you can develop a natural sense of beatmatching and become proficient in creating smooth transitions between tracks. Remember to focus on practicing without relying on digital features and gradually bring up the volume of the new track while lowering the old one. This will help you develop a keen ear and a deep understanding of the music you are mixing.
Summary:
- Find the beat of each track and identify the consistent rhythm.
- Use the pitch shift feature on the turntable to adjust the tempo and match the beats.
- Ensure the beats are in phase by starting the mix at the beginning of a phrase.
- Practice beatmatching without relying on digital features to develop a natural sense of timing.
DJ Setup for Turntables and Mixer: Adjusting Tempo and Pitch
Adjusting the tempo and pitch on a turntable is a crucial skill for DJs to ensure seamless transitions and maintain beat synchronization. By manipulating the rotation speed and pitch of the turntable, DJs can create unique and dynamic mixes that cater to the energy of the crowd. Here are some techniques to help you master the art of adjusting tempo and pitch on a turntable.
Firstly, DJs can use the pitch fader or tempo slider to increase or decrease the rotation speed of the turntable, thereby altering the pitch of the track. By slowing down the rotation speed, the track’s pitch will decrease, while speeding it up will raise the pitch. This adjustment allows DJs to match the tempo and key of different tracks, creating smooth transitions between songs.
Another technique is manual speed control. DJs can touch the sides of the turntable or gently twist the spindle to manually alter the speed of the record. This method requires precise control and can be used for subtle adjustments during mixes. DJs should practice these manual adjustments to develop a sensitive touch and maintain the desired beat synchronization.
When adjusting tempo and pitch on a turntable, it’s crucial to focus on phrase matching. DJs should use headphones to separate the music tracks, enabling them to hear each track individually and adjust the tempo accordingly. By matching the beats and aligning phrases, DJs can create harmonious blends that captivate the audience.
Throughout the adjustment process, DJs should rely on their ears and trust their instincts. As with any skill, practice is key to mastering the art of adjusting tempo and pitch. By experimenting with different techniques and exploring the capabilities of their turntables, DJs can elevate their performances and deliver unforgettable mixes.
How to Connect Turntables to Mixer FAQs
How do I connect turntables to a mixer?
To connect turntables to a mixer, you’ll need a sturdy turntable with slipmats, a reliable mixer, a pair of headphones, and vinyl records. Connect the turntable to the mixer using RCA cables, adjust the levels for balanced sound, and plug in your headphones for cueing.
How do I set up my mixer and turntables?
Connect the turntable to the mixer using RCA cables. Adjust the levels on the mixer to ensure a balanced sound. Plug in your headphones to the mixer to cue up the next song. If using a DVS (Digital Vinyl System) compatible sound card, connect your turntables to the sound card’s input and use USB cables to connect the sound card to your laptop or mixer. Set up the special timecode vinyl on your turntable and check for further settings within your software. Connect the ground cable to prevent humming sounds and assign crossfader to the correct channels.
What are the main components of a turntable?
The main components of a turntable are the platter and tonearm. The platter is where the vinyl record is placed and rotated at a constant speed by a motor. The tonearm holds the cartridge, which reads and plays back the music on the record. Turntables can have direct-drive or belt-driven motors, and different cartridges are available for different performance styles. Other components to consider are the platter mat, circuit board, and feet.
How do I cue up a track on a turntable?
Cueing up a track on a turntable involves setting cue points and finding the desired starting point of the track. Cue points can be set using the plus button or the console button on the turntable. Start playing the new track through your headphones, syncing it with the current track. When you reach the cue point, hit play on the new track and fade out the old one. It’s important to practice cueing up tracks to ensure seamless transitions.
What is beatmatching and how do I do it?
Beatmatching is the process of synchronizing the beats of two tracks for seamless blending. Find the beat of each track, use the pitch shift feature on the turntable to adjust the tempo, and make sure the beats are in phase with each other. Phrase matching is important for smooth transitions; mix in at the beginning of a phrase. Practice beatmatching without relying on digital features, and gradually bring up the volume of the new track while lowering the old one.
How do I adjust tempo and pitch on a turntable?
Adjusting tempo and pitch on a turntable is essential for keeping the beats in sync. Use the pitch fader or tempo slider to speed up or slow down the rotation of the turntable, which increases or decreases the pitch of the track. Manually control the speed of the record by touching the sides of the turntable or twisting the spindle. Focus on maintaining phrase matching and use headphones to separate the music tracks and adjust the tempo accordingly.
What do I need to practice to master the art of turntable DJing?
Connecting turntables to a mixer and mastering the art of turntable DJing takes practice and the right techniques. Proper setup, understanding the components of a turntable, cueing up tracks, beatmatching, and adjusting tempo and pitch are all important skills to develop. By following these steps and practicing regularly, you can become proficient in mixing with turntables and create seamless transitions that will impress your audience. Remember to invest in high-quality equipment and keep your records clean for optimal performance.
Conclusion
Mastering the art of turntable DJing and connecting turntables to a mixer requires practice and the right techniques. By following the step-by-step process of setting up your mixer and turntables, understanding the components of a turntable, cueing up tracks, mastering beatmatching techniques, and adjusting tempo and pitch, you can become proficient in DJing with turntables and create seamless transitions that will impress your audience.
Investing in high-quality equipment, such as sturdy turntables with slipmats and a reliable mixer, is crucial for optimal performance. Remember to connect your turntables to the mixer using RCA cables, adjust the levels on the mixer for balanced sound, and plug in your headphones for cueing. Additionally, keeping your vinyl records clean and practicing regularly will help you refine your skills and achieve mastery.
So, whether you’re a seasoned DJ or just starting, with dedication and perseverance, you can elevate your DJ setup for turntables and mixers to new heights. Connect the dots, mix the beats, and let your creativity flow through the turntables. Get ready to rock the party and leave your audience in awe of your incredible mixing skills.
Our Mission: At AudioInspects, we are dedicated to providing the most comprehensive and authentic reviews of audio equipment on the market. We conduct independent testing and research of products, so you can make an informed decision before making a purchase. Our mission is to help you find the best audio equipment to improve your listening experience. So trust us to deliver the most reliable recommendations and advice.
Disclosure: When you do decide to make a purchase through our links, please note that we may earn a commission, but this does not affect the honesty of our reviews. You can read our affiliate disclosure in our Disclosure.